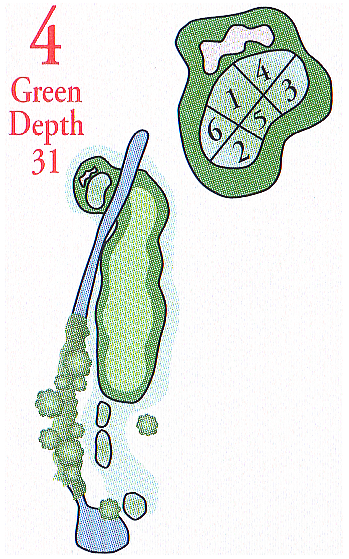
Hole 4 - Par 4
With hazards on left and out of bounds right, #4 requires you to hit make a shot that would give you the best angle on your approach.A collection area sits in front of the green but would still test any player's short game to save par. Longer hitters can try to get to the green in one, but watch out for tall trees that would knock it down to the hazard on the left side into the creek.
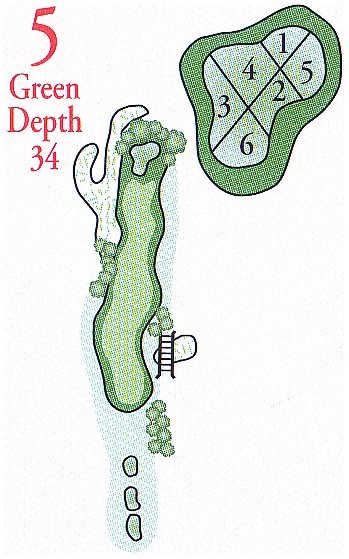
Hole 5 - Par 4
This hole tempts the player to play an aggressive drive for a shot at birdie. A well placed shutoff the tee is required .An aggressive approach shot is also needed but proceed with caution, as out of bounds on the left and long as well as trees on the right, the more strategic option is a well placed shot allowing for open access to this undulating green.
Hole 6 - Par 5
Lorem ipsum dolor sit amet, consectetur adipiscing elit. Donec semper fringilla ultrices. Sed et commodo nisi, et semper nunc. Phasellus vel finibus sem. Sed ultrices ex vitae orci facilisis, at pellentesque tellus euismod.Nullam sed gravida nisi, non mattis eros. Vivamus varius vulputate ultrices. Fusce consectetur blandit nisi gravida hendrerit. Nunc sodales blandit magna aliquet maximus.

Hole 7 - Par 4
A very challenging hole what requires two great shots to have a chance on birdie. A well placed drive is essential to setting up a manageable second shot. A long fairway bunker and out of bounds on the left hand side needs to be avoided, as does water on the right.Two bunkers protect both sides of the relatively big, sloping green.

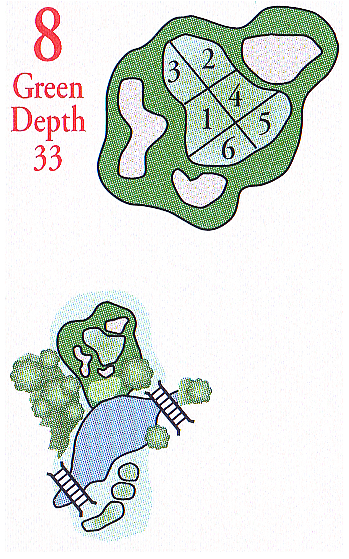
Hole 9 - Par 5
Our closing hole in the front side is a par 5, having a decent tee shoot is critical in this well protected green to have a chance for birdie.Having your approach shot hit the right area in this multi tiered green whilst missing the bunker in the right side and OB long and left, this green provides plenty of thought and respect when trying to hole out for birdie.
