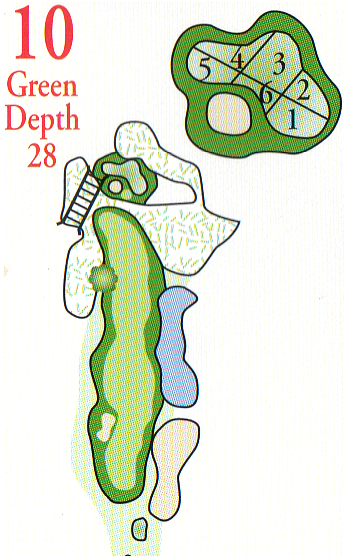
Hole 10 - Par 5
The tenth hole provides players plenty of options to choose from as they navigate this par 5 hole.Although unreachable by most players on the second shot, the hole begs you to swing away and hit it as hard as you can. Be careful though, as a well placed marsh area in front can mean the difference between a birdie opportunity and double bogey.
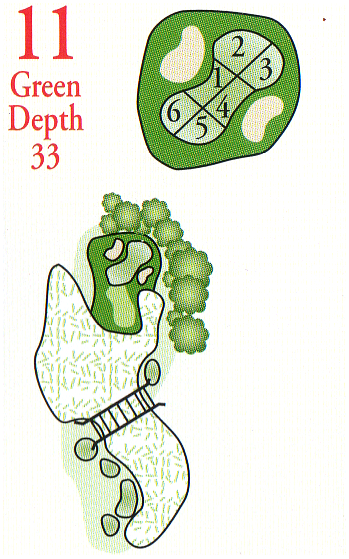
Hole 11 - Par 3
The tee shot will call for a carry over a marsh area to the green which is tucked at the edge of the tree-line.With bunkers and hazard surrounding all but the front of the green, the tee shot should not be taken lightly. Once on the green, players will face a variety of undulations and slopes as they try to hole their putt.
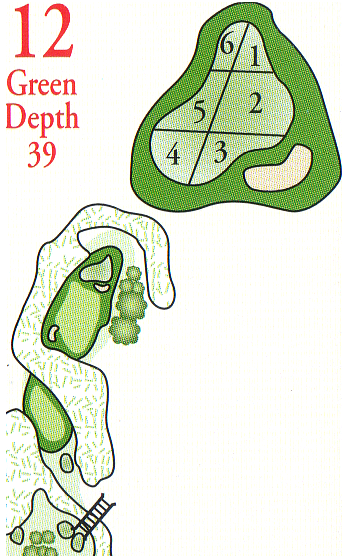
Hole 12 - Par 4
Players will want to avoid hitting their drive too far and end up in a well placed bunker in the left side of the fairway. Most players will have a short or mid iron in hand for their approach shot into the green with a false front.Although one bunker protects the right side of the green, the challenge lies in actually hitting the green and staying there.
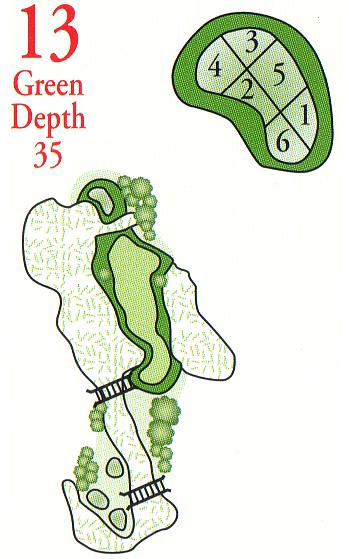
Hole 13 - Par 4
The thirteenth hole was designed with a large marsh obscuring the view of the left side of the fairway as well as the green. An ideal ball placement should be on the middle or right side of the fairway giving players a short to mid iron home.The green is also protected by out of bounds right, long and a small marsh patch on the left side.
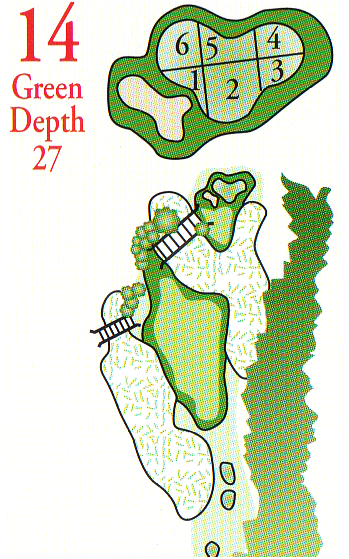
Hole 14 - Par 4
Designed around a number of large mature trees on both sides and a large marsh area, this slight dogleg left par 4 requires a well placed tee bally to avoid having to play their second shot around the cluster trees on the rightPlayers will face a challenging approach shot to a green surrounded by a bunker on the left. and hazards on the right. A very undulating green provides plenty of interesting lines and looks at the hole.
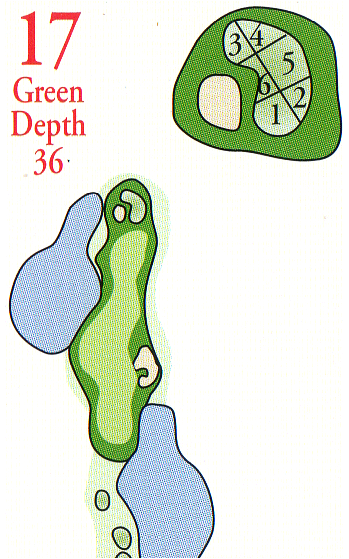
Hole 17 - Par 4
A well placed drive leaves one easy access into this green protected by bunker in front.Be careful not to go through the green, as a slope shot back across the green would be testing to say the least . Leaving your approach shot below the hole is key to make a stress-free birdie or par.
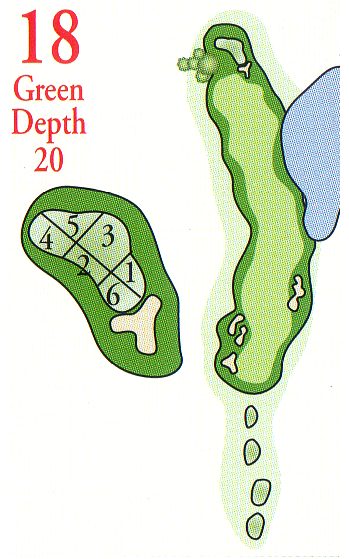
Hole 18 - Par 5
A long and challenging par 5 through a wide fairway divided by big waste areas will take you home to the clubhouse. Keep your concentration and you might pick up a finishing birdie if you can successfully avoid the deep bunker on the front.Leaving your second shot on the right side of the fairway provides better accessibility to the flag.